Warehouse Scheduler
Purpose
The Warehouse Scheduler enables administrators to configure Snowflake warehouse properties based on the time of day and day of the week (Weekdays, Saturday, Sunday). This is particularly beneficial for workloads with variable resource demands throughout the day or week, enabling optimized performance and cost efficiency.
Creating, Editing, or Deleting a Warehouse Schedule
- Navigate to Operations → WH Schedule. A list of available Snowflake warehouses will be displayed.
- Locate the warehouse you wish to schedule and click "Schedule" in the Action column.
If the warehouse is not yet scheduled, an informational window will appear. Click the blue "Enable Schedule" button in the window. - You will be directed to the Scheduler screen.
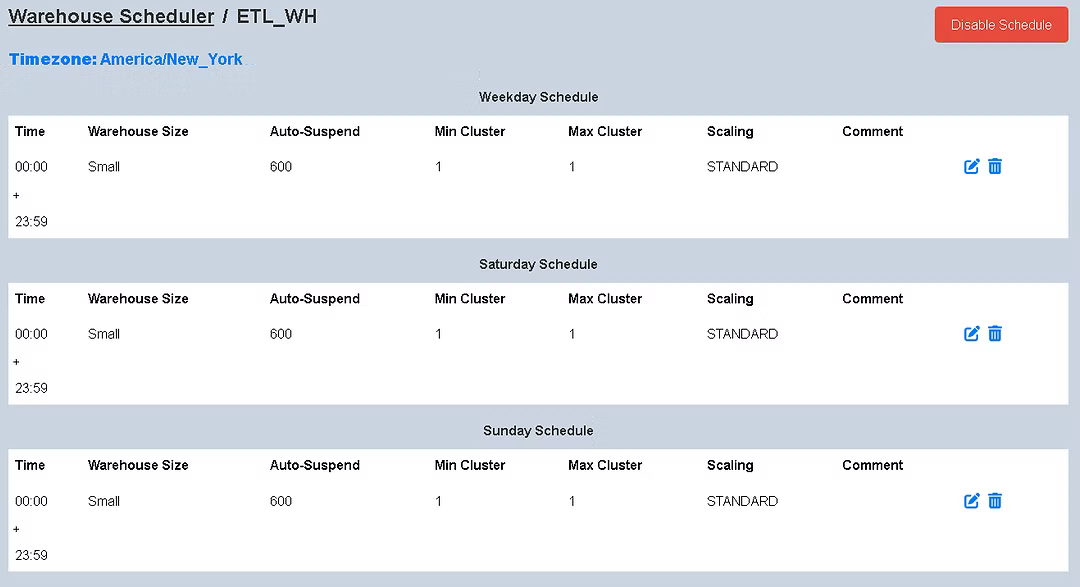
By default, the schedule spans from 00:00 to 23:59 for Weekday, Saturday, and Sunday sections. - Click “+” to add a new time range during which warehouse properties should change.
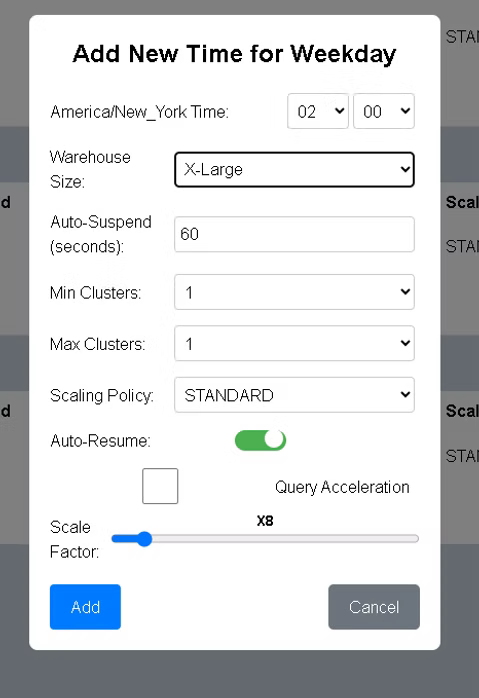
Click “–” to remove an existing time range. - A pop-up window will appear when adding or editing a schedule.
- Enter the desired warehouse settings (e.g., size, auto-suspend) and click "Add" or "Save".
Note: Time selection is in 15-minute increments. Minutes must be either 00, 15, 30, or 45. - You will return to the Warehouse Scheduler screen for the selected warehouse.
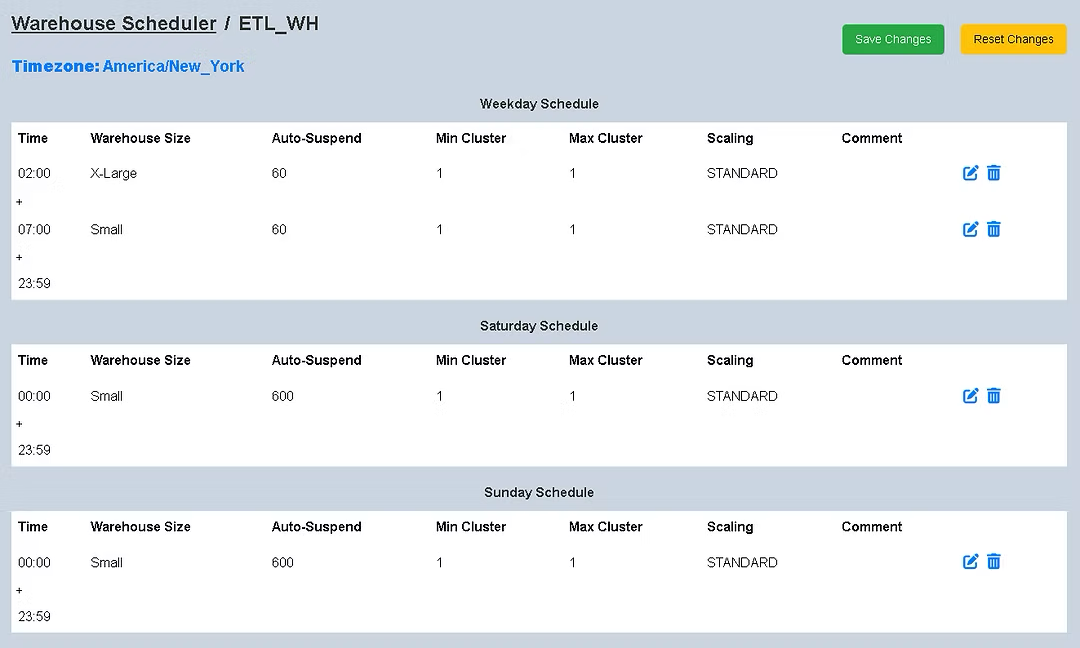
Review the configured time ranges and property settings. - If the configuration looks correct, click "Save Changes" to store the schedule in the database.
The new schedule will take effect immediately. - To disable scheduling, click the red "Disable Schedule" button.
Note
- All schedule times are displayed in your configured time zone, indicated in blue on the Scheduler page.
- To change your time zone, navigate to Settings → Timezone.